This section of documentation refers to no longer a maintained feature. If you want to use Delivery Tracking go to Delivery Tracking v2
Integration Guide
This part of the documentation will guide you through the steps of integrating with Ingrid tracking solution. It consists of two parts:
- installing and displaying Ingrid Tracking Widget on your page,
- providing orders for Ingrid to track.
Installing Tracking Widget
This part consist of two steps: authentication (backend) and embedding widget (frontend).
Authentication
Before you can load Tracking Widget, you need to obtain an auth token using token.ensure endpoint detailed below.
Request:
POST v1/tokenauth/token.ensure HTTP/1.1
Host: api.ingrid.com
Accept: application/json
Content-Type: application/json
Authorization: Bearer base64-encoded-private-key
x-site-id: your-site-id

{
    "site_id": "your-site-id",
    "resource": "tracking-number-or-external-id"
}
Response:
HTTP/1.1 200 OK
Content-Type: application/json

{
    "token": "auth-token"
}
Generated token authenticates Tracking Widget and authorizes its access to the resource (tracking number or external ID) specified in the payload. Pass it to your frontend site and use it to embed the widget.
Your private key must not be exposed to Customer's browser. For that reason, `token.ensure` API call should happen on the backend and only generated token should be passed to browser client.
Embedding widget
Tracking Widget should be embedded in a site controlled by Merchant. The most common scenario is a dedicated tracking page within Merchant's domain and built by Merchant specifically to host Tracking Widget. A link to this tracking page with embedded Tracking Widget is subsequently given to Customer.
Flow for the Merchant:
- Load Tracking Widget code:
<script src="https://cdn.ingrid.com/tracking-widget/bootstrap.js"></script>- Select which element of the page should be the widget container and give it a unique id. For example:
<div id="tracking-widget"></div>- After the script is loaded, initialize Tracking Widget using JavaScript:
window.IngridTrackingWidget.config({
  elementId: string,
  trackingNumber: string,
  externalId: string,
  siteId: string,
  locale: string,
  authToken: string,
});- After calling
IngridTrackingWidget.configfunction Tracking Widget should appear in the specified container.
IngridTrackingWidget.config
IngridTrackingWidget.config function expects as argument an options object with 4 required properties:
elementId: HTML ID of the container to inject the tracking widget intositeId: Id of the siteauthToken: Authorization token fromhttps://api.ingrid.com/v1/tokenauth/token.ensure- resource id: either
trackingNumberorexternalId. Passing both of them at the same time will result in an errortrackingNumber: The number that we will fetch the tracking events forexternalId: The ID of the order provided by Merchant
Optional properties for IngridTrackingWidget.config are:
locale: Adjusts the language - by default the widget will useen-US. See Supported Languages:
Stage environment
To use Tracking Widget on stage environment, replace:
https://api.ingrid.com/withhttps://api-stage.ingrid.com/,https://cdn.ingrid.com/withhttps://cdn-stage.ingrid.com/
Supported Languages
The following locales are supported:
- Czech - cs-CZ
- Danish - da-DK
- Dutch - nl-NL
- English (Australia) - en-AU
- English (Canada) - en-CA
- English (Ireland) - en-IE
- English (United States) - en-US
- English (Great Britain) - en-GB
- Estonian - et-EE
- French - fr-FR
- Finnish (Finland) - fi-FI
- Finnish (Sweden) - fi-SE
- German - de-DE
- Greek - el-GR
- Croatian - hr-HR
- Icelandic - is-IS
- Italian - it-IT
- Japanese - ja-JP
- Korean - ko-KR
- Lithuanian - lt-LT
- Norwegian Bokmål - nb-NO
- Norwegian Nynorsk - nn-NO
- Norwegian - no-NO
- Polish - pl-PL
- Portuguese - pt-PT
- Russian - ru-RU
- Slovak - sk-SK
- Slovenian - sl-SI
- Spanish - es-ES
- Swedish (Finland) - sv-FI
- Swedish (Sweden) - sv-SE
Providing orders to track
When using Ingrid Transport Automation all of your shipments will be automatically visible in Ingrid tracking solution and you can skip that section.
If you are using an external system for booking your orders you can still track them using Ingrid Tracking Widget.
The one thing we would need you do to is to post the tracking number you got from your external booking system and specify the order number (external_id or tos_id) together with the carrier product that was used for booking.
To send an externally booked order to Ingrid system you should do a POST request to service-events-gateway.
Request
POST v1/events_gateway/events.registerTrackingNumber HTTP/1.1
Host: api.ingrid.com
Accept: application/json
Content-Type: application/json
Authorization: Bearer base64-encoded-api-token

{
  "tracking_number": "BST000185540",
  "external_id": "592978",
  "carrier_product_ref": "postnord-mypack-collect",
  "direction_type": "OUTBOUND"
}
Specifying a concrete carrier product used for booking can be tricky as each party or system usually operates based on self-made identifiers. That is why Ingrid created a mechanism that makes the integration easier by allowing any integrator to reuse its own internal naming while being precise about the carrier product - see carrier product mapping.
direction_type is an optional field, that holds information about initial package direction. This information helps us to show you the most accurate list on MAD and also helps to serve the best tracking experience for your customers. This field is especially important when you are registering not only outbound parcels but also return one - e.g. you are booking a return shipment and want to register it in our system.
Carrier product mapping
carrier_product_ref is a carrier product reference from external system that is mapped in Ingrid and indicates which carrier product has been used.
This reference can be any string, but for all orders booked with the same carrier product it should be the same.
Each time you start using a new carrier product, it needs to be mapped in order to enable tracking for it. Mappings can be created in the Ingrid Merchant Platform (Delivery Tracking > Features) and there are two ways to do it - you can use one of the carrier products already defined by Ingrid, or create a custom configuration.
Using existing carrier product
This is how the configuration windows looks like:
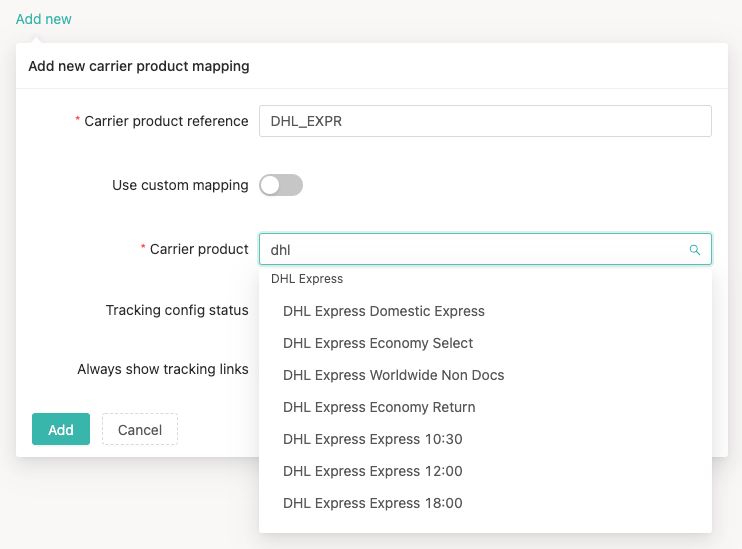
Here you can enter your carrier product reference and select the corresponding carrier product. After selecting your desired carrier product, you will be able to see the status of the Ingrid tracking integration for this product - is it available and does it need some additional configuration. Even if it's not, don't worry - in that case Ingrid will show carrier's tracking links instead.
Creating custom mapping
If your desired carrier product isn't contained in Ingrid's list of available products, or if you want to show custom tracking links, you may want to create a custom mapping. Here is how to do it:
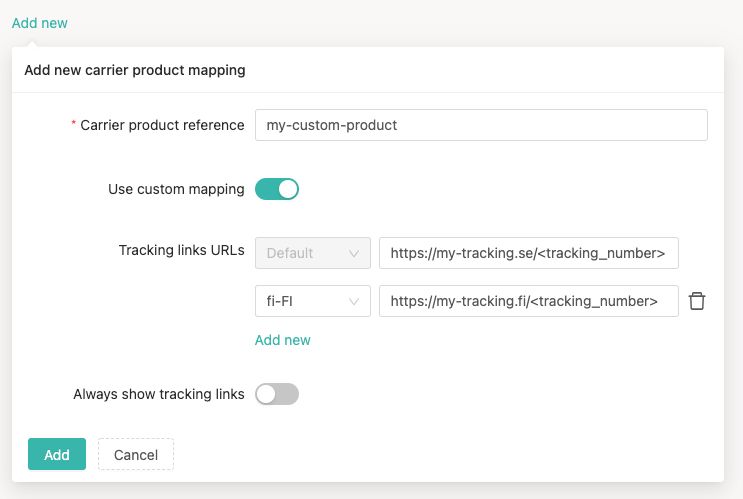
If you need, you can add separate URLs for every locale.
Every custom URL needs to contain <tracking_number> placeholder. It will be filled with the shipment's tracking number by Ingrid.
Custom events
Custom events are localized messages that you can use to provide more information to your customers regarding what is currently happening with their parcel. Some example custom events may be:
- Package needs more time to be assembled.
- Package is waiting for pickup by carrier.
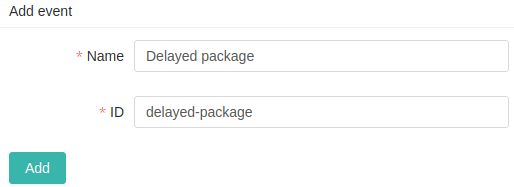
Creating custom events
Custom events can be created in the Ingrid Merchant Platform (Delivery Tracking > Events).
After event creation, it should appear in the table.
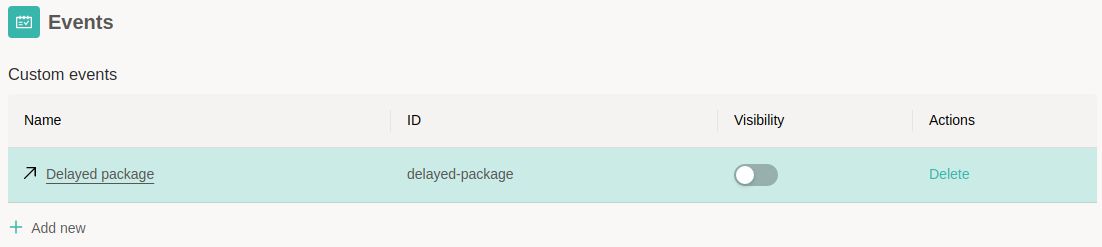
You can edit those and provide translations of your custom events.
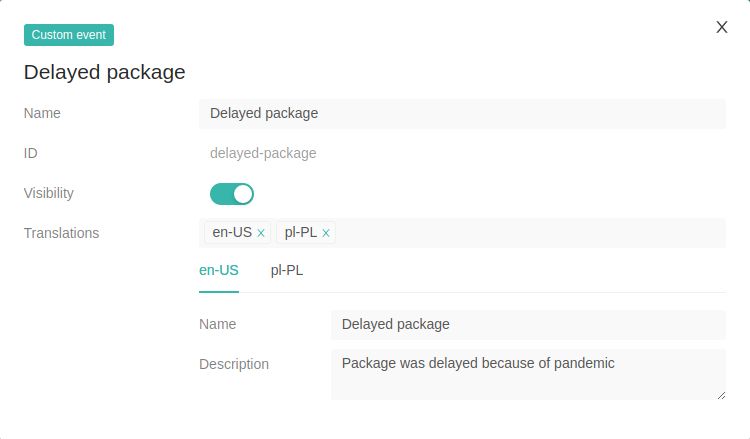
You can always change Name and Description. After accepting a draft, new translations will be visible on all events (even the older ones).
Using custom events
To attach custom event to a package, you should do a POST request to service-events-gateway.
POST v1/events_gateway/events.publishTrackingEvent HTTP/1.1
Host: api.ingrid.com
Accept: application/json
Content-Type: application/json
Authorization: Bearer base64-encoded-api-token

{
    "tracking_number": "BST000079234",
    "tracking_status": "CUSTOM",
    "occurred_at": "2006-01-02T15:04:05+07:00",
    "custom_event_type_id": "delayed-package"
}
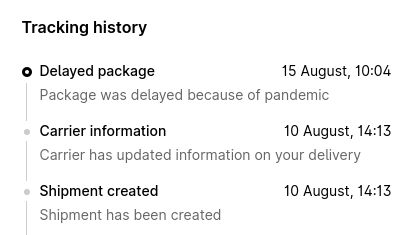
If you will use a tracking widget with locale that you did not specify translations for, raw event name would be used as a default.