Returns Integration Guide
This guide will walk you through all the integration and configuration steps needed to get the Returns system ready for launch. The steps are categorized as Required, Recommended, and Nice-to-have to help you prioritize your integration efforts.
Except for the initial shop/account creations, all of these steps can be set up by yourself in the Returns Backoffice. We are of course available to help with all of these steps and can set most of it up for you.
Also even if the steps are numbered, most of the steps can be handled in a different order.
Required Steps
These steps are essential to get the basic Returns functionality working.
1. Shop Setup
There are 2 ways to setup a shop in the Returns backoffice:
If you install our Shopify plugin called: Ingrid ‑ Returns and Exchanges, the shop will be integrated automatically. If you have test shops in shopify you can do the same for them.
2. User Account Setup
You will need one admin user from which you can create new users for the system.
When you can successfully login as an admin you can create more users here:
https://returns-portal.ingrid.com/settings/users
3. E-commerce Connection
Connect your e-commerce platform to the Returns service:
https://returns-portal.ingrid.com/settings/admin
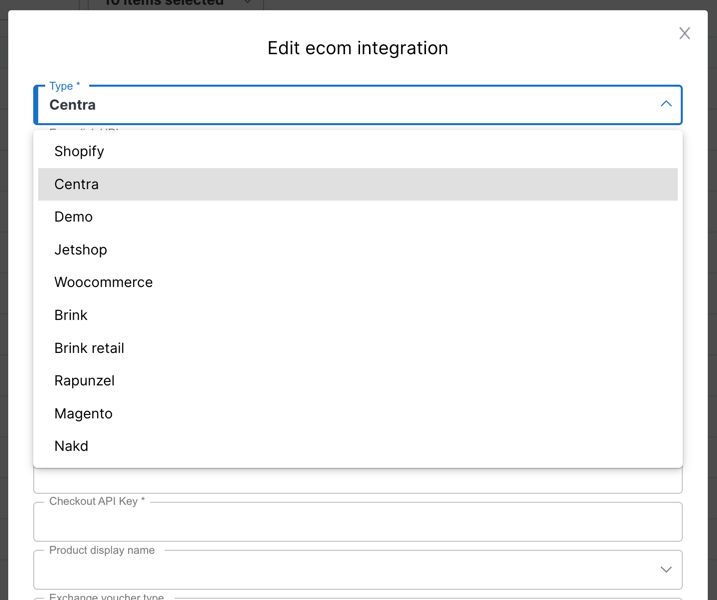
At this point, the returns service is integrated to your e-commerce and will be working with minimum setup.
Only manual upload shipment labels will be offered to customers.
For each registered return, you'll have to manually upload a return shipment label. You can go ahead and try to see if you can go through the returns service with some test orders.
To create a return you want to go through the return widget like a consumer eventually would.
The Widget Setup Guide explains how to run the widget either as a simple App URL or as an embedded iframe.
- Create a test order in your e-commerce system
- Try to initiate a return using the returns widget
- Verify that the return shows up in the returns backoffice
- Check that any communication between the returns system and your e-commerce works as expected
Recommended Steps
These steps are recommended to configure before you attempt to go live with the product.
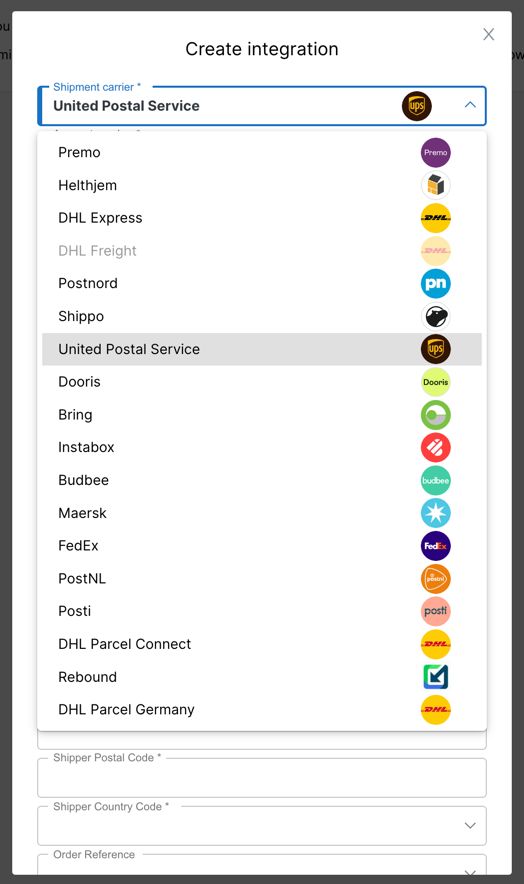
4. Carrier Integration
Before configuring your price setups/shipment options you want to take a look at setting up some carrier integrations.
https://returns-portal.ingrid.com/integrations/shipment
- Select a carrier you want to use for returns
- Configure necessary credentials and parameters for that carrier
- When submitting the carrier integration will be automatically tested and you will get feedback
- Repeat for each carrier
This can be more or less difficult, but we have lots of experience setting this up can can do it for you
5. Price Setups
Configure the prices, features and shipment carriers that should be available for different customers and/or products.
https://returns-portal.ingrid.com/settings/price-setups
- Create a new price setup
- Select pre-conditions for who and what this price setting applies to
- Configure features and prices to apply for this setup
- Select which carriers/shipment services should be available
After successfully setting it up the overview can look something like this

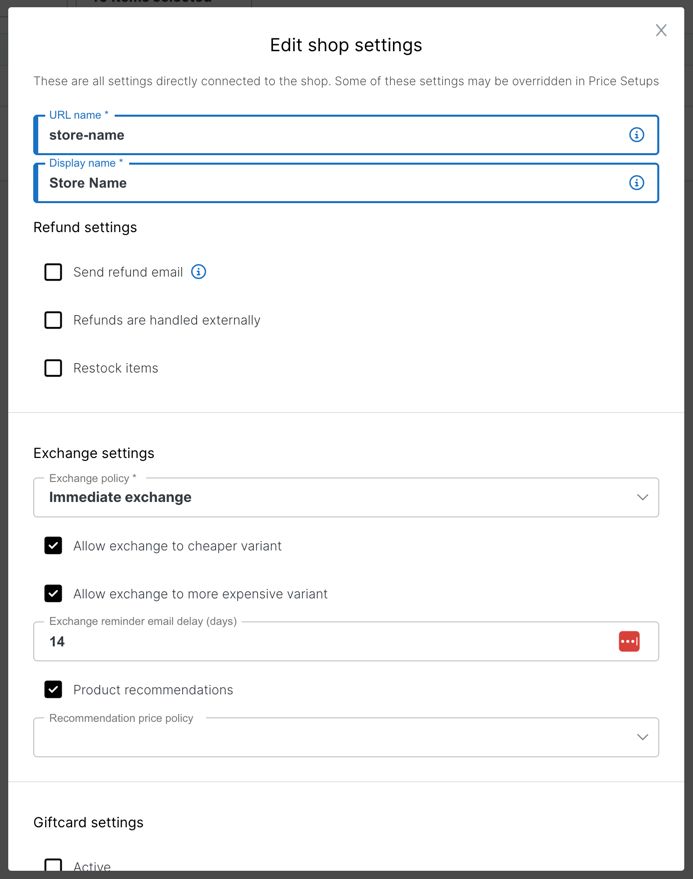
6. Shop Settings
There are plenty of store settings that are worth looking into. They can change how:
- Refunding and restocking works
- What items are available for exchange
- Quality Check behaviour
- And more
https://returns-portal.ingrid.com/settings/admin
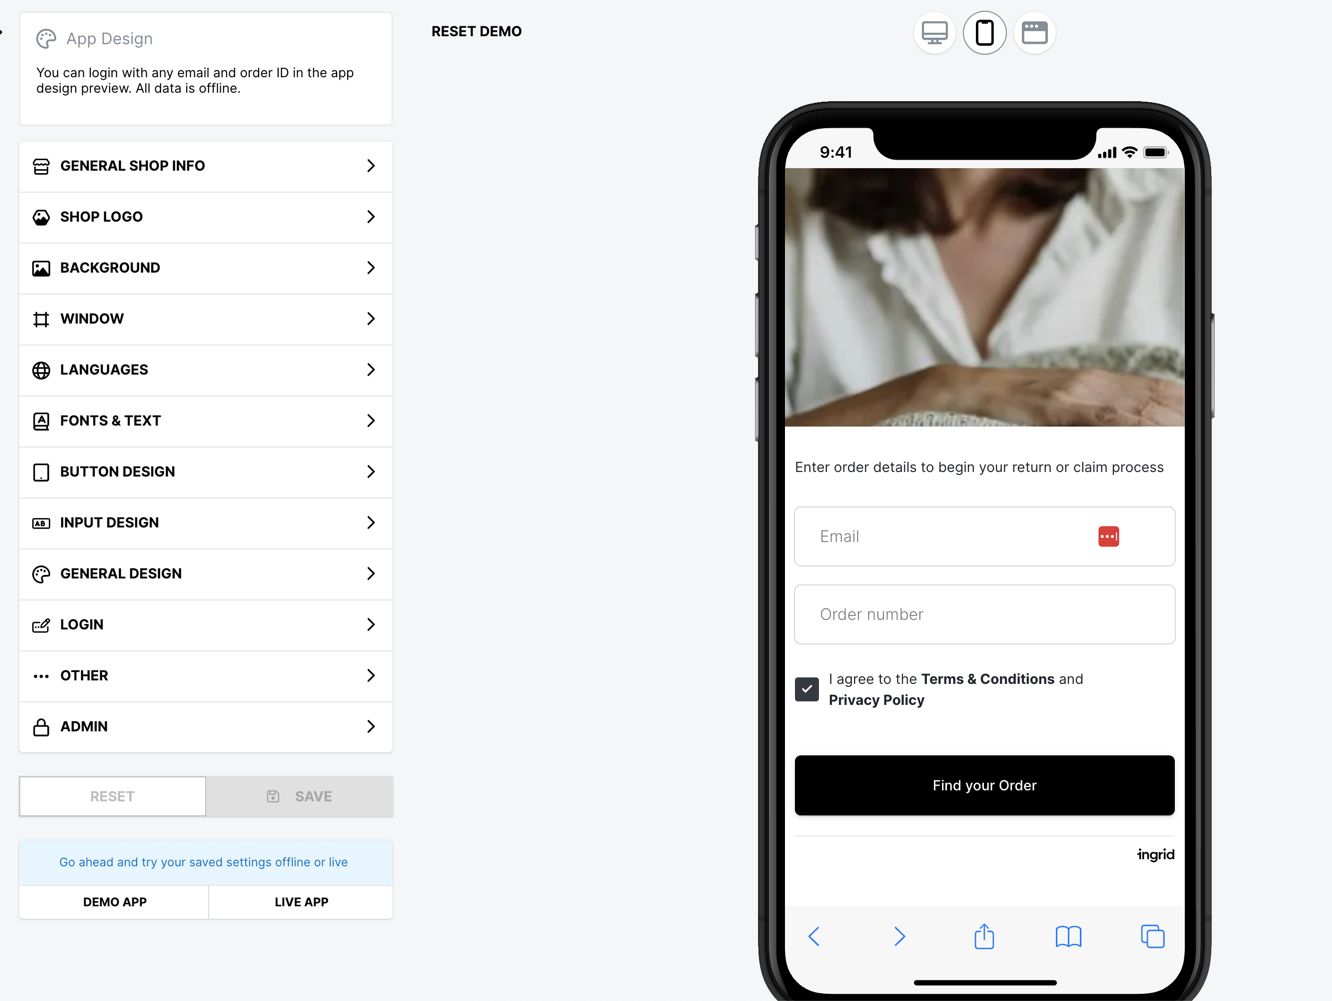
7. Widget Design
Technically not needed, but you probably want to check out the widget design section to give the widget a bit more of your branding and personal touch. It's also here that you set the available languages for the widget.
https://returns-portal.ingrid.com/settings/app-design
It's quite fun to set this up and all the changes you make you see live while changing them. Go ahead and try it out and play around with the different settings.
See the The Widget Setup Guide section for more info on configuring and deploying the widget.
At this point, you should have a fully working returns system with different shipment methods offered to customers together with a personalized widget look.
You could go live at this point if you wish but some of the "Nice-to-have" setups are worth looking into since they can be of more or less importance to you.
At this point it is of course a good idea to run through some more test orders to verify that things are working as intended.
8. Warehouse Reporting/Integration
When returned items arrive at your warehouse or store they will need to be reported for things like restocking inventory etc. There are 3 ways to use a warehouse reporting system with Ingrid returns
https://returns-portal.ingrid.com/quality-check
A barcode scanner can be used to scan packages and items to swiftly report them in the system.
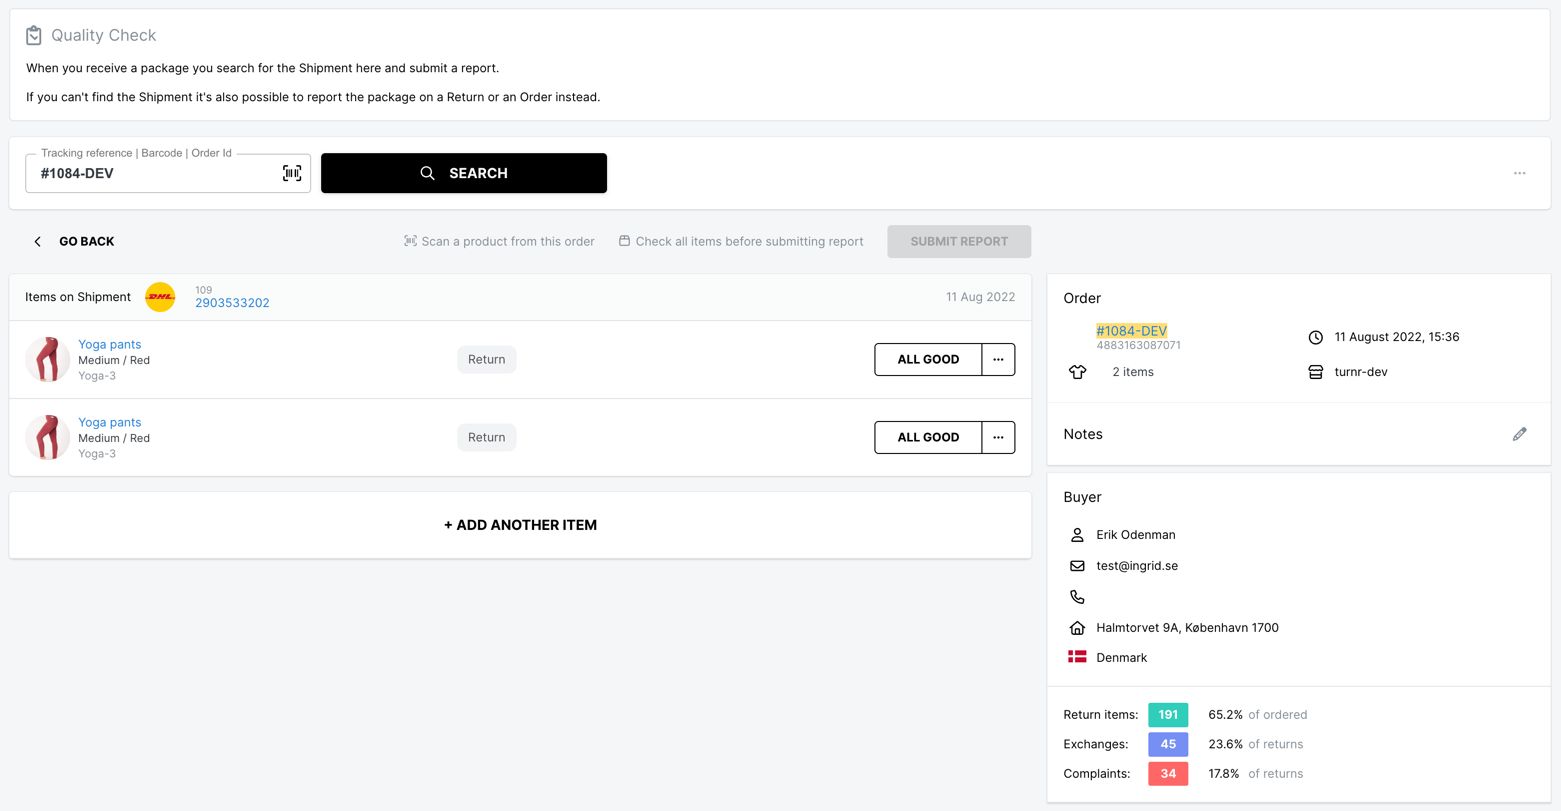
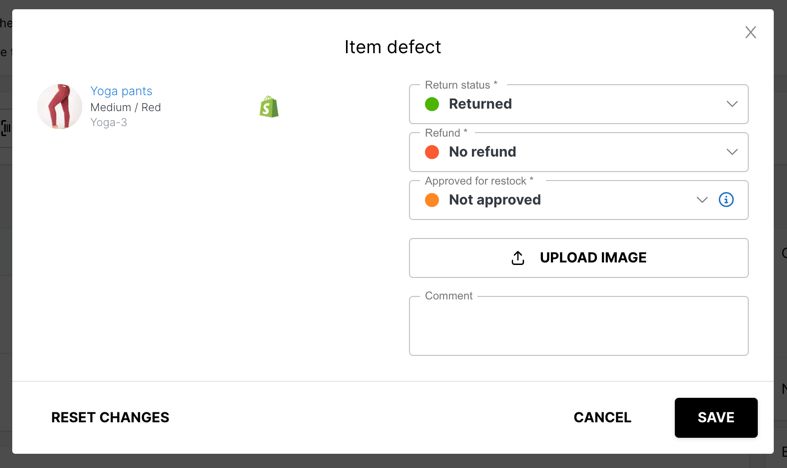
When reporting each item you can get to make choices that changes what happens in terms of refunds and restocking.
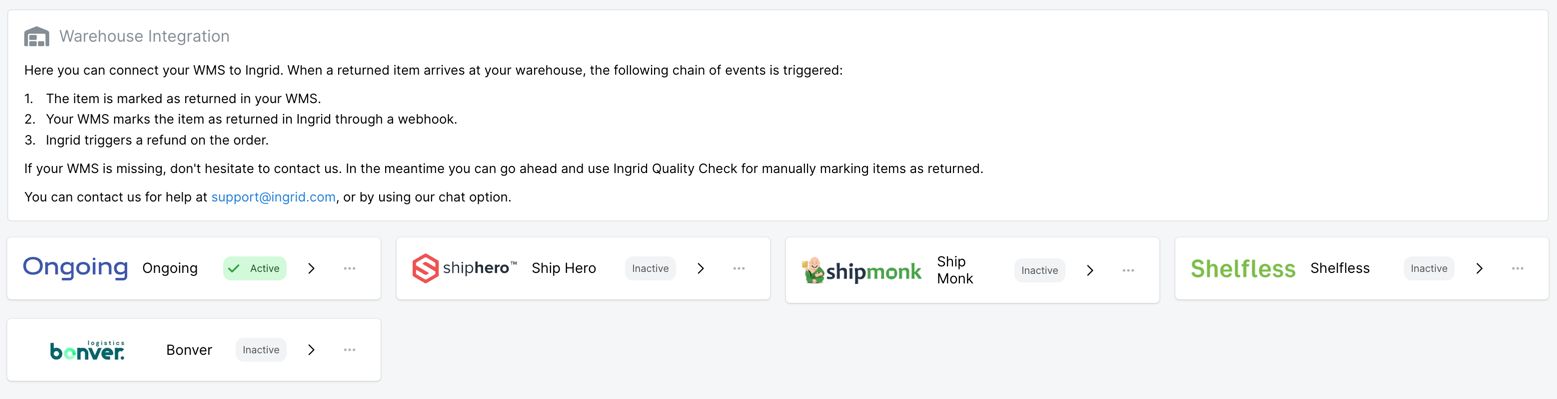
Accounts can easily be created for your warehouse staff. You can always begin reporting using Quality Check and later switch to a Warehouse Integration or an API Integration
https://returns-portal.ingrid.com/integrations/warehouse
No matter which reporting system you use you will be able to read warehouse reports here:
https://returns-portal.ingrid.com/warehouse-reports
Nice-to-have Steps
These steps will enhance the returns experience and further personalize it to fit your brand.
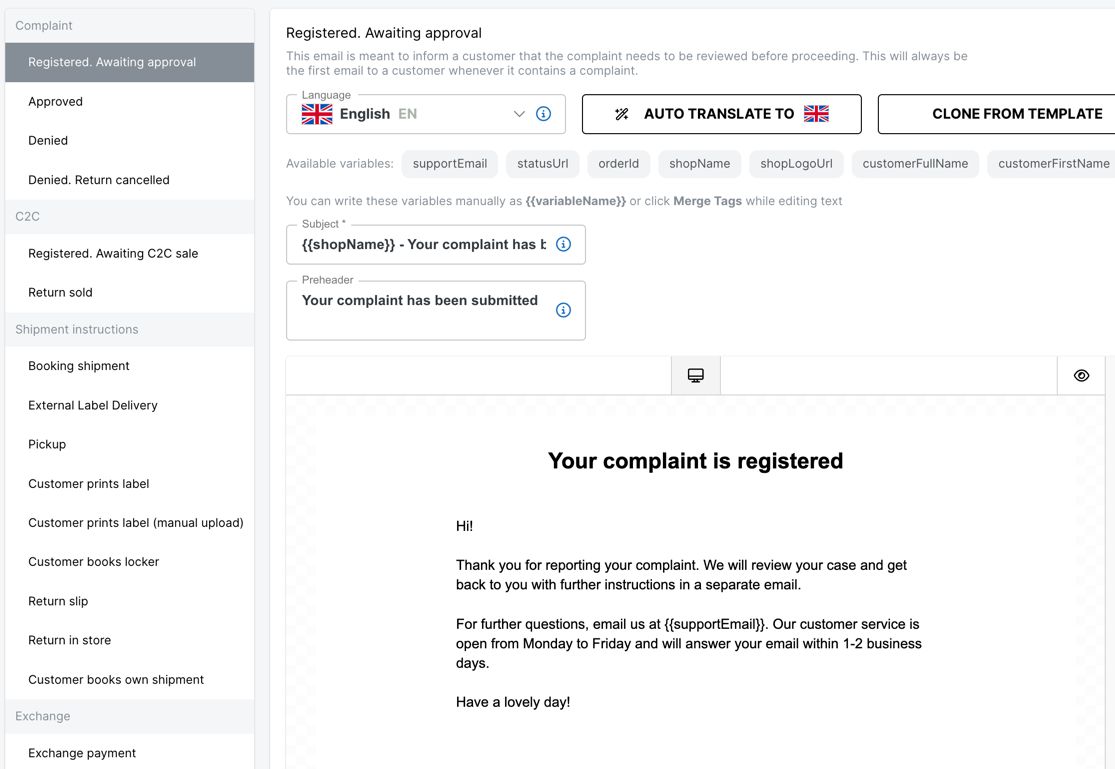
9. Email Templates
In different stages of the return life-cycle emails will be sent out to the customer. We have already setup default email templates that will work just fine.
https://returns-portal.ingrid.com/settings/email
However you might want to personalize these to better fit your brand and we have an email template editor that you can use to edit each email as you wish.
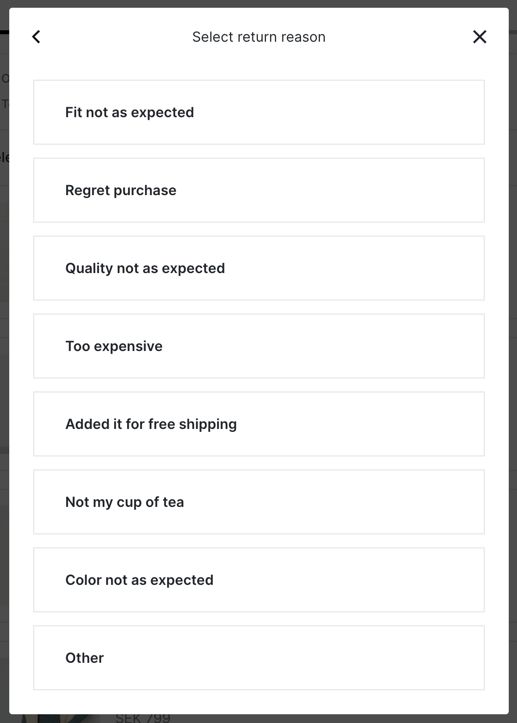
10. Return Reasons
We have default return reasons setup for you. But you might want to personalize these depending on the available item categories. These categories are automatically fetched from your e-com integration. You can customize them here:
https://returns-portal.ingrid.com/settings/return-reasons
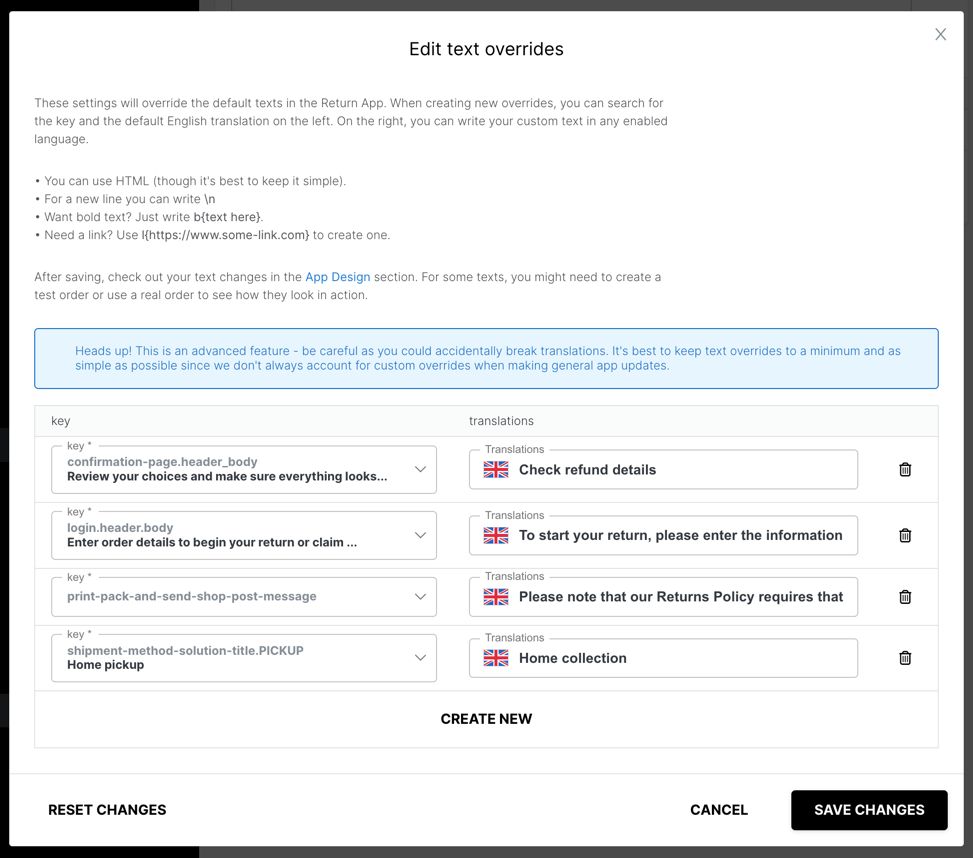
11. Text Overrides
If you would like to change some text in the customer facing widget. We have a system where you can change any text and in any language. Just navigate to admin settings you will find this setting under your shop.
https://returns-portal.ingrid.com/settings/admin