Integration Guide
This part of the documentation will guide you through the steps of embedding the Ingrid Upsell widget.
- Embed the widget script in the
HEADsection:
<script src="https://cdn.ingrid.com/upsell-widget/bootstrap.js"></script>In staging/testing environment use this link: https://cdn-stage.ingrid.com/upsell-widget/bootstrap.js
- Create an empty placeholder in the desired place of your webpage:
<div id="ingrid-upsell-widget"></div>- Initialize the widget:
const widget = new ingrid.upsell("ingrid-upsell-widget", {
  auth_token: "ingrid-http-auth-token:aaaaaaaa-bbbb-cccc-dddd-eeeeeeeeeeee",
  country: "SE",
  locales: ["sv-SE"],
  cart: {
    currency: "SEK",
    total_value: 1000,
    vouchers: ["promo_voucher"],
    items: [
      {
        name: "Keyboard",
        sku: "107346",
      },
    ],
  },
});
The parameters have the following meaning:
auth_token- global Upsell widget authorization token. Read the Authorization section to find out more.country- country in ISO-alpha-2 format.locales- an array of locales.cart.currency- currency code in ISO-4217 format.cart.total_value- total amount in cents.
- Update the cart along the user journey to recompute free delivery options:
Use the widget.updateCart that accepts same parameters as outlined in the point above.
- Listen to events from widget in real-time:
widget.addListener("free_delivery_reached", () => console.log("Free delivery!"));Following events are availabled:
free_delivery_reached- the cart is elegible for free delivery.ready- the upsell widget has loaded.
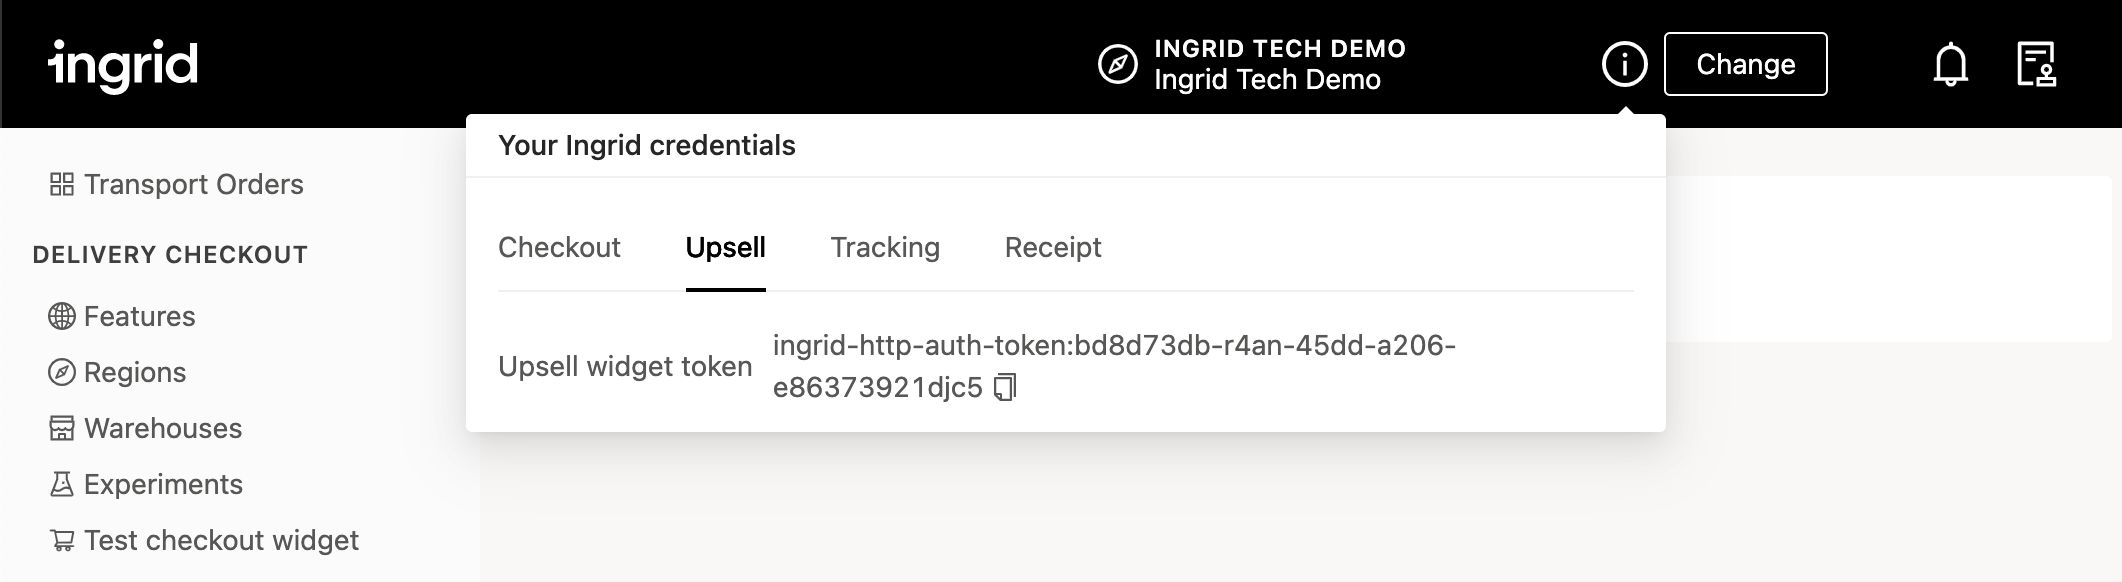
Authorization
You can find your token in Ingrid Merchant Platform. After logging into the platform click the info icon in the top right corner of the site.
Customization
It is possible to customize the behaviour of the upsell widget in Ingrid Merchant Platform.
Models & Types Reference
Config:
{
  "auth_token": string
  "cart": CartState
  "locales": []string
  "country": string
}
CartState:
{
  "currency": string,
  "attributes": string[]
  "items": CartItem[],
  "total_value": number,
  "vouchers": string[]
}
CartItem:
{
  "attributes": string[],
  "name": string,
  "price": number,
  "quantity": number,
  "sku": string
}